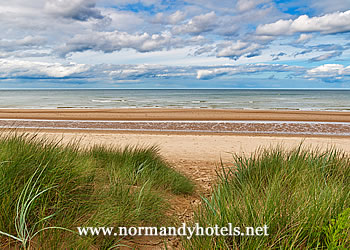
D-Day Beaches in Lower Normandy
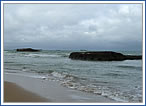
There are five beaches which featured in the D-Day landings stretched along the Lower Normandy coast from Sword Beach at Ouistreham in the east to Utah Beach on the west side of the Cotentin peninsula.
The beaches were divided between different nationalities and battle groups, with the Americans having Omaha on the western edge of the north-facing beaches and Utah on the Cotentin peninsula, the British and Commonwealth troops using Gold in the middle and Sword in the east, while the Canadians landed at Juno beach in between the two British landing areas.
Sword Beach
Sword Beach was the most easterly of the D-Day beaches and consisted of an 8km stretch of coast between Ouistreham and Saint-Aubin-sur-Mer. The landings were principally carried out by British and Commonwealth troops, with a small force of Free French commandos. The main objective was to take the town of Caen to the south.
The attacks on Sword Beach were preceded by an airborne landing of glider troops and paratroopers to the east of the Orne to protect the eastern flank of the troops moving inland from the beach.
Compared to the other D-Day beaches, Sword was relatively lightly defended and the forces from the initial landings moved swiftly inland and linked up with the paratroopers at Ranville.
However, a counter-attack by German armoured troops reached the beaches at Lion-sur-Mer before being beaten back by air attacks. This meant that the planned link-up between British and Canadian forces on the neighbouring beaches was delayed. The presence of the armoured troops and defensive reinforcements also meant that the planned objective of taking the regional centre of Caen was unsuccessful.
Juno Beach
Juno Beach was the landing area to the west of Sword Beach and stretched from Saint-Aubin-sur-Mer through to Courseulles-sur-Mer. The landings were carried out principally by Canadian units, although British commandos were also tasked with linking up to the forces moving inland from Sword Beach. The objective for forces landing on Juno Beach was to take Carpiquet Airport to the west of Caen.
Although the two villages at each end of the beach were fiercely defended, the Canadian forces made good progress off the beaches and actually ended up the furthest forward of all of the Allied forces. Despite that, the progress halted before their objective of the airport because of the threat of armoured counter attacks.
Gold Beach
Gold Beach was another British and Commonwealth forces landing area between the Canadian forces at Courseulles-sur-Mer and the American troops at Omaha Beach. The landings between Arromanches and La Rivière were meant to link with the Canadian forces to the east, secure the Arromanches area for the Mulberry harbour supply project and to capture Port-en-Bessin, linking up with the American forces to the west.
Following that, the plan was for the troops to push south into Bayeux cutting the communications and transport route to Caen.
Although the landings were fiercely resisted, the troops broke out from the beach relatively quickly and secured the Arromanches area and reached the suburbs of Bayeux in the evening.
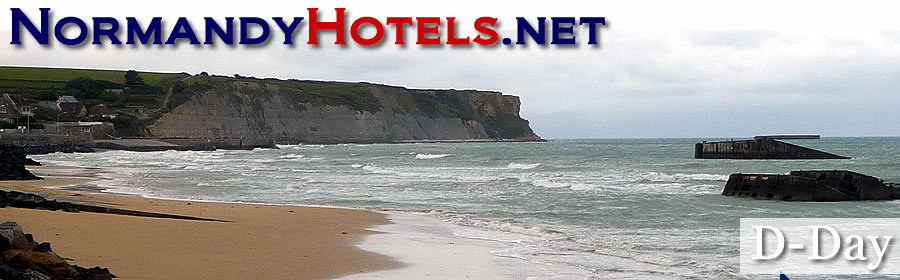
Omaha Beach
Omaha Beach was one of the two substantial American landings on the Normandy coast. Omaha was located to the west of Gold Beach and the main landing beach is roughly located between Vierville-su-Mer and Sainte-Honorine-des-Pertes.
The beach was thought to have been defended by relatively unenthusiastic troops recruited from German-occupied countries. However, another more experienced regiment had moved forward to help defend the sector and this, along with the terrain and conditions, caused Omaha Beach to be the hardest landing of D-Day.
The naval bombardment which was supposed to precede the landings had been ineffective against the strong defensive positions and the rough seas meant that many landing craft foundered or ended up in a different part of the beach. A withering crossfire and prepared artillery placement meant that some of the initial elements ceased to exist as an effective fighting force.
The second and third waves of landings also encountered problems. The planned routes to move off the beach up the draws between the steep bluffs had been fortified by strongpoints and eventually the immediate beach defences were cleared by improvised troop movements up the steep terrain which was more lightly defended.
At one point an evacuation of the forces from Omaha had been considered, however, the troops managed to create a small beachheads inland from the coast and eventually Omaha became one of the two big Mulberry harbour emplacements which helped to supply the Normandy campaign.
The original objectives of the Omaha Beach landings were however only achieved three days later.
West of Omaha Beach is the Pointe du Hoc, which was the scene of a famous cliff assault from the American Rangers. The American Military Cemetery in Normandy is located south of the beach at Colleville-su-Mer.
Utah Beach
Utah Beach was a landing zone on the eastern side of the Cotentin peninsula running between Pouppeville and La Madeleine. It was not originally part of the planned landings but was added later to protect the western flank.
The landings on this beach were the least difficult of all, with less than 200 casualties. Much of this was due to the advance troops landing in the wrong place, encountering light resistance and heading inland under their own initiative.
Map of the Beaches
D-Day Touring Routes
The Normandy tourist authorities have put together a number of touring routes for those with their own transport which cover different aspects of the Normandy landings and campaign:
| Number | Route Name |
|---|---|
| 1 | Overlord - The Assault (the Anglo-Canadian landings in the east) |
| 2 | D-Day - The Shock (the American landings at Omaha beach) |
| 3 | Objective - A Port (Utah beach landings and the advance on Cherbourg) |
| 4 | The Confrontation (the bloody stalemate around Caen) |
| 5 | Cobra - The Breakout (the attack south down the Cotentin peninsula) |
| 6 | The Counter-Attack (the German forces attempt to halt the Allies) |
| 7 | The Encirclement - (closing the Falaise Pocket from the south) |
| 8 | The Outcome (the decisive battle in the Falaise area) |